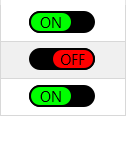
You may not know it, but QT provides a Switch button widget that is becoming quite common on GUIs these days. It replaces the QcheckButton and QRadioButton quite gracefully in most cases. Indeed, it is of the bool cad type either it is active or it is inactive.
However, even if it is available in Qt, it is only available for QML but not for PyQt5 and Pyside2. Normally, it should have arrived for Pyside6 for years. As for PyQt5, there is nothing planned to my knowledge.
The tutorial on Dashboard has revived my interest for this kind of widget, especially since I will need it soon. However, with an on / off button and a switch button, the choice is quickly made. I vote for the switch button.
But since he is not present, it will be difficult. Would everything be lost? No.
I came across this subject (it is the only one I found while surfing the web) which allows you to create a QPushButton in subclass. The result as you can see is superb (and even customizable).
However, I found its implementation complicated. Explanations would be welcome.
I wonder if Martin (or John Li) could not redo this hand tutorial based on the type of button. It would also make it possible to approach QPainter still differently.
1 Like
I vote in favour. This widget is highly sought after and interests a lot of people but it is quite complex to understand and implement.
In case you missed it, there is now a custom switch widget available here by Salem. It uses QPropertyAnimation to add the animated behaviour (see here for a tutorial) and the animation, colours, etc. are configurable.
1 Like
Hi martin,
Indeed, I’ve missed it. Thanks a lot, that’s greats tutorials. I’ll try them soon I will get some free time.
BTW: The second link is dead ie give me an error.
The good link is here
1 Like
Thanks! I posted a link to my local dev server  fixed.
I’ve seen that. 
Great. 
I’ll take a look on those the next week. I hope. I’ll be in vacation.
@martin
Hi,
I have finally not only do it but too resolve a lot of typo errors from my part. But not only:
There two attributes errors at this location in the paint method :
# the handle will move along this time
    trailLenght = contRect.width() - 2 * handleradius

    xPos = contRect.x() + handleradius + trailLenght * self._handle_position

    if self.pulse_anim.state() == QPropertyAnimation.Running:
        p.setBrush(self._pulse_checked_animation if self.isChecked() else self._pulse_unchecked_animation)
        p.drawEllipse(QPointF(xPos, barRect.center().y()), self._pulse_radius, self._pulse_radius)

    if self.isChecked():
        p.setBrush(self._bar_checked_brush)
        p.drawRoundedRect(barRect, rounding, rounding)
        p.setBrush(self._handle_checked_brush)
By replacing by the right attributes :
# the handle will move along this time
    trailLenght = contRect.width() - 2 * handleradius

    xPos = contRect.x() + handleradius + trailLenght * self._handle_position

    if self.pulse_anim.state() == QPropertyAnimation.Running:
        p.setBrush(self._pulse_checked_color if self.isChecked() else self._pulse_unchecked_color)
        p.drawEllipse(QPointF(xPos, barRect.center().y()), self._pulse_radius, self._pulse_radius)

    if self.isChecked():
        p.setBrush(self._bar_checked_brush)
        p.drawRoundedRect(barRect, rounding, rounding)
        p.setBrush(self._handle_checked_brush)
And now the file is terminated normally with non error (instead of error 134 like before).
otherwise it’s article is a very good and great approach to what QPropertyAnimation/QPropertyAnimationGroup can do. However, it is not simple at first and even at second. Anyway, thanks to Salem for tackling this problem and enlightening us on it.
Now the 1st difficulty is going to be to do it in separate (or at least not linked the 2 QcheckBox together then and the se will be the hardest of them integrate into Qt Designer.
I feel like it’s not won yet. 
In fact, for getting only one button or without linked the first with the second has been more easy than I was planning.
Modifying the app.py code, I obtain just one switch button. Really great. Now the next step is getting two or three switch buttons but independent from others.
Here the code for one switch button :
from PyQt5.QtWidgets import QApplication, QWidget, QVBoxLayout, QLabel
from animated_toggle import AnimatedToggle
app = QApplication(sys.argv)
window = QWidget()
mainToggle = AnimatedToggle()
mainToggle.setFixedSize(mainToggle.sizeHint())
window.setLayout(QVBoxLayout())
window.layout().addWidget(QLabel(“Main Toggle”))
window.layout().addWidget(mainToggle)
mainToggle.stateChanged.connect(mainToggle.setChecked)
I have two others questions about the second tutorial from Salem about Switch Button.
-
Can we add some text with switch button like QCheckBox or must we add before an QLabel (Probably) ?
-
I’ve got the second switch button still black even changing the color code.
Here my code :
import sys

from PyQt5.QtWidgets import QMainWindow, QWidget, QVBoxLayout, QApplication
from qtwidgets import Toggle, AnimatedToggle

# from animated_toggle import AnimatedToggle


class Window(QMainWindow):

    def __init__(self):
        super(Window, self).__init__()

        toggel_1 = Toggle()
        toggel_2 = AnimatedToggle(checked_color="FFB000", pulse_checked_color="44FFB000")
        container = QWidget()
        layout = QVBoxLayout()
        layout.addWidget(toggel_1)
        layout.addWidget(toggel_2)
        container.setLayout(layout)

        self.setCentralWidget(container)


app = QApplication(sys.argv)
window = Window()
window.show()
app.exec_()
