Great tutorial. I will definitely check the book. Do you have examples of using fbs for packaging while creating the GUI with designer and loading with loadUiType?
Thanks
Great tutorial. I will definitely check the book. Do you have examples of using fbs for packaging while creating the GUI with designer and loading with loadUiType?
Thanks
I’m also interested in this.
I did just create the coolest thing which loops through the uic file loads the object and recreates the missing stuff objects as self.[name] the nice name for reuse as i was having trouble connection stuff to the slots before from my original code but now it all works and i figured id share this as normally i’d have to manually find each child object and manually call it like
# self.controlpaneldropdown = self.findChild(QtWidgets.QComboBox, 'controlpaneldropdown') # Find the button
After seeing this cool article i knew there had to be a way to load them all on the fly vs having to keep adding them one by one. I cannot believe nobody has done this before at least that I could find.
Now i can literally use QT Designer to design edit it live and all the signals an slots i added below the loop work and I can edit visually add new stuff and rapidly protoype without breaking the layout.
I’m going to create a new fbs app and try to splice this approach in and then ill report back i already and pretty far along my existing FBS app so not sure how well its going to go as i gotta feed this into the application context which is going to be even trickier but it seems like it should be possible.
from PyQt5 import uic, QtWidgets
import sys
from PyQt5.QtCore import QObject

qtCreatorFile = "mainwindow.ui"  # Type your file path
Ui_MainWindow, QtBaseClass = uic.loadUiType(qtCreatorFile)


class build(Ui_MainWindow, QtWidgets.QMainWindow):
    def __init__(self, parent=None):
        QtWidgets.QMainWindow.__init__(self)
        Ui_MainWindow.__init__(self)
        self.setupUi(self)

        for name, obj in dict(self.__dict__).items():
            # print(str(name) + str(obj))
            obj_type = str(obj).strip("<PyQt5").rsplit(" ")[0].replace(".", '', 1)
            # obj_type = str(obj).strip("<").rsplit(" ")[0]
            # print(obj_type)
            # obj_type = obj_str.strip("<PyQt5").rsplit(" ")[0].replace(".", '', 1)
            label_name = "self." + str(name)
            try:
                label_name = self.findChild(eval(obj_type), name)
                print(str(label_name) + ' created')
            except:
                pass
            if not isinstance(obj_type, QObject):
                continue


def start():
    app = QtWidgets.QApplication(sys.argv)
    bld = build()
    bld.show()
    sys.exit(app.exec_())


if __name__ == '__main__':
    start()
@David_Boutelier @martin
I was able to get this working now and here is minimal example of how i did it.
Hopefully this is helpful for other people this should be the default way to develop so fast now to prototype and test new widgets along with actual functionality.
The code stub. I tried to take as much out as possible but leave enough in for reference.
# from fbs_runtime.application_context import is_frozen
# from fbs_runtime.excepthook.sentry import SentryExceptionHandler
import os
import sys
import requests
from PyQt5 import uic, QtWidgets
from PyQt5.QtCore import *
from PyQt5.QtGui import *
from PyQt5.QtWidgets import *
from PyQt5.QtWidgets import QApplication
from fbs_runtime.application_context.PyQt5 import ApplicationContext, \
    cached_property

target_db = os.path.join(os.path.abspath(os.path.dirname(sys.argv[0])), "wizardassistant.db")


class AppContext(ApplicationContext):
    def run(self):
        version = self.build_settings['version']
        QApplication.setApplicationName("Wizard Assistant")
        QApplication.setOrganizationName("Wizard Assistant")
        QApplication.setOrganizationDomain("wizardassistant.com")
        current_version = version
        self.main_window.setWindowTitle("Wizard Assistant v" + version)
        # current release version url
        current_release_url = 'https://wizardassistant.com/current_release.txt'

        def versiontuple(v):
            return tuple(map(int, (v.split("."))))

        try:
            # Parse current release version from url
            response = requests.get(current_release_url)
            current_release = response.text

            print('Current Version: ' + current_version)
            print('Current Release: ' + current_release)
            # Compare versions
            if versiontuple(current_release) > versiontuple(current_version):
                print('New Update Available: ' + current_release)
                self.main_window.setWindowTitle(
                    "Wizard Assistant v" + version + '| New Update Available: ' + current_release)
                self.main_window.set(
                    "Wizard Assistant v" + version + '| New Update Available: ' + current_release)
                update_available = True
            else:
                update_available = False
            print('Update Available:' + str(update_available))
        except:

            pass

        self.main_window.show()
        return self.app.exec_()

    @cached_property
    def main_window(self):
        return MainWindow(self)

    QApplication.setStyle("Fusion")
    #
    # # Now use a palette to switch to dark colors:
    palette = QPalette()
    palette.setColor(QPalette.Window, QColor(53, 53, 53))
    palette.setColor(QPalette.WindowText, Qt.white)
    palette.setColor(QPalette.Base, QColor(25, 25, 25))
    palette.setColor(QPalette.AlternateBase, QColor(53, 53, 53))
    palette.setColor(QPalette.ToolTipBase, QColor(25, 25, 25))
    palette.setColor(QPalette.ToolTipText, Qt.white)
    palette.setColor(QPalette.Text, Qt.white)
    palette.setColor(QPalette.Button, QColor(53, 53, 53))
    palette.setColor(QPalette.ButtonText, Qt.white)
    palette.setColor(QPalette.BrightText, Qt.red)
    palette.setColor(QPalette.Link, QColor(42, 130, 218))
    palette.setColor(QPalette.Highlight, QColor(42, 130, 218))
    palette.setColor(QPalette.HighlightedText, Qt.black)
    QApplication.setPalette(palette)

    # @cached_property
    # def app_db(self):
    #     global target_db_path
    #     target_db_path = self.get_resource('wizardassistant.db')
    #     return QSqlDatabase(self.get_resource('wizardassistant.db'))

    # @cached_property
    # def app_style(self):
    #     # global stylesheet
    #     return QFile(self.get_resource('mystylesheet.css'))


qtCreatorFile = os.path.join(os.path.abspath(os.path.dirname(sys.argv[0])), "mainwindow.ui")  # Type your file path
Ui_MainWindow, QtBaseClass = uic.loadUiType(qtCreatorFile)


class MainWindow(QtWidgets.QMainWindow, Ui_MainWindow):
    def __init__(self, ctx):
        super(MainWindow, self).__init__()
        self.ctx = ctx
        # def __init__(self, *args, **kwargs):
        #     super().__init__(*args, **kwargs)
        self.setupUi(self)
        # self.show()
        for name, obj in dict(self.__dict__).items():
            # print(str(name) + str(obj))
            obj_type = str(obj).strip("<PyQt5").rsplit(" ")[0].replace(".", '', 1)
            # obj_type = str(obj).strip("<").rsplit(" ")[0]
            # print(obj_type)
            # obj_type = obj_str.strip("<PyQt5").rsplit(" ")[0].replace(".", '', 1)
            label_name = "self." + str(name)
            try:
                label_name = self.findChild(eval(obj_type), name)
                print(str(label_name) + ' created')
            except:
                pass
            if not isinstance(obj_type, QObject):
                continue

        # self.controlpaneldropdown = self.findChild(QtWidgets.QComboBox, 'controlpaneldropdown')  # Find the button
        self.sshterminal = TabbedTerminal(self.terminalwidget)
        self.sshterminal.setObjectName(u"sshterminal")
        self.verticalLayout.addWidget(self.sshterminal)

        # Clear default text
        self.DomainValue.setText('')
        self.WhoisUrl.setText('')
        self.RegistrarValue.setText('')
        self.RegistrarStatusValue.setText('')
        self.DomainExpiresValue.setText('')
        self.DNSSECValue.setText('')
        self.CloudflareStatus.setText('')
        self.HostnameValue.setText('')
        self.command_requires_label.setText('')
        self.command_description.setText('')

        #Put all your custom signals slots and other code here.


import sys

if __name__ == '__main__':
    appctxt = AppContext()
    exit_code = appctxt.run()
    sys.exit(exit_code)
You can tell if its working when you fire up the app via fbs or manually cause you will see all the objects being created which means you can then interact and connect and work with them despite not having defined them individually via find child etc. So only need to put the logic not in the xml in the spot after my example.
In my case you can see all the tons of objects being created.
(venv-fbs) [someusername@someusername-All-Series:~/PycharmProjects/WizardAssistant]$ fbs run
Found websshport from sqlite:8889
http://localhost:8889
/home/someusername/PycharmProjects/WizardAssistant/src/main/python/wizardassistant.db
Starting SSH websocket server in the background
Linux
target_db expected path: /home/someusername/PycharmProjects/WizardAssistant/src/main/python/wizardassistant.db
[I 200612 10:34:33 settings:127] WarningPolicy
[I 200612 10:34:33 main:71] Listening on :8889 (http)
<PyQt5.QtWidgets.QWidget object at 0x7efd6af938b8> created
<PyQt5.QtWidgets.QHBoxLayout object at 0x7efd6af939d8> created
<PyQt5.QtWidgets.QWidget object at 0x7efd6af93a68> created
<PyQt5.QtWidgets.QVBoxLayout object at 0x7efd6af93af8> created
<PyQt5.QtWidgets.QMenuBar object at 0x7efd6af93b88> created
<PyQt5.QtWidgets.QMenu object at 0x7efd6af93c18> created
<PyQt5.QtWidgets.QMenu object at 0x7efd6af93ca8> created
<PyQt5.QtWidgets.QMenu object at 0x7efd6af93d38> created
<PyQt5.QtWidgets.QMenu object at 0x7efd6af93dc8> created
<PyQt5.QtWidgets.QStatusBar object at 0x7efd6af93e58> created
<PyQt5.QtWidgets.QDockWidget object at 0x7efd6af93ee8> created
<PyQt5.QtWidgets.QWidget object at 0x7efd6af93f78> created
<PyQt5.QtWidgets.QVBoxLayout object at 0x7efd5cca5048> created
<PyQt5.QtWidgets.QVBoxLayout object at 0x7efd5cca50d8> created
<PyQt5.QtWidgets.QLineEdit object at 0x7efd5cca5168> created
<PyQt5.QtWidgets.QLineEdit object at 0x7efd5cca51f8> created
<PyQt5.QtWidgets.QLineEdit object at 0x7efd5cca5288> created
<PyQt5.QtWidgets.QLineEdit object at 0x7efd5cca5318> created
<PyQt5.QtWidgets.QLineEdit object at 0x7efd5cca53a8> created
<PyQt5.QtWidgets.QLineEdit object at 0x7efd5cca5438> created
<PyQt5.QtWidgets.QLineEdit object at 0x7efd5cca54c8> created
<PyQt5.QtWidgets.QLineEdit object at 0x7efd5cca5558> created
<PyQt5.QtWidgets.QDateTimeEdit object at 0x7efd5cca55e8> created
<PyQt5.QtWidgets.QPushButton object at 0x7efd5cca5678> created
<PyQt5.QtWidgets.QPushButton object at 0x7efd5cca5708> created
<PyQt5.QtWidgets.QDockWidget object at 0x7efd5cca5798> created
<PyQt5.QtWidgets.QWidget object at 0x7efd5cca5828> created
<PyQt5.QtWidgets.QVBoxLayout object at 0x7efd5cca58b8> created
<PyQt5.QtWidgets.QGroupBox object at 0x7efd5cca5948> created
<PyQt5.QtWidgets.QVBoxLayout object at 0x7efd5cca59d8> created
<PyQt5.QtWidgets.QComboBox object at 0x7efd5cca5a68> created
<PyQt5.QtWidgets.QGroupBox object at 0x7efd5cca5af8> created
<PyQt5.QtWidgets.QVBoxLayout object at 0x7efd5cca5b88> created
<PyQt5.QtWidgets.QComboBox object at 0x7efd5cca5c18> created
<PyQt5.QtWidgets.QGroupBox object at 0x7efd5cca5ca8> created
<PyQt5.QtWidgets.QVBoxLayout object at 0x7efd5cca5d38> created
<PyQt5.QtWidgets.QLineEdit object at 0x7efd5cca5dc8> created
<PyQt5.QtWidgets.QTableView object at 0x7efd5cca5e58> created
<PyQt5.QtWidgets.QLabel object at 0x7efd5cca5ee8> created
<PyQt5.QtWidgets.QLabel object at 0x7efd5cca5f78> created
<PyQt5.QtWidgets.QDockWidget object at 0x7efd5ccbc048> created
<PyQt5.QtWidgets.QWidget object at 0x7efd5ccbc0d8> created
<PyQt5.QtWidgets.QVBoxLayout object at 0x7efd5ccbc168> created
<PyQt5.QtWidgets.QTextEdit object at 0x7efd5ccbc1f8> created
<PyQt5.QtWidgets.QDockWidget object at 0x7efd5ccbc288> created
<PyQt5.QtWidgets.QWidget object at 0x7efd5ccbc318> created
<PyQt5.QtWidgets.QVBoxLayout object at 0x7efd5ccbc3a8> created
<PyQt5.QtWidgets.QGroupBox object at 0x7efd5ccbc438> created
<PyQt5.QtWidgets.QGridLayout object at 0x7efd5ccbc4c8> created
<PyQt5.QtWidgets.QLabel object at 0x7efd5ccbc558> created
<PyQt5.QtWidgets.QLabel object at 0x7efd5ccbc5e8> created
<PyQt5.QtWidgets.QLabel object at 0x7efd5ccbc678> created
<PyQt5.QtWidgets.QLabel object at 0x7efd5ccbc708> created
<PyQt5.QtWidgets.QLabel object at 0x7efd5ccbc798> created
<PyQt5.QtWidgets.QLabel object at 0x7efd5ccbc828> created
<PyQt5.QtWidgets.QLabel object at 0x7efd5ccbc8b8> created
<PyQt5.QtWidgets.QLabel object at 0x7efd5ccbc948> created
<PyQt5.QtWidgets.QLabel object at 0x7efd5ccbc9d8> created
<PyQt5.QtWidgets.QLabel object at 0x7efd5ccbca68> created
<PyQt5.QtWidgets.QLabel object at 0x7efd5ccbcaf8> created
<PyQt5.QtWidgets.QLabel object at 0x7efd5ccbcb88> created
<PyQt5.QtWidgets.QLabel object at 0x7efd5ccbcc18> created
<PyQt5.QtWidgets.QLabel object at 0x7efd5ccbcca8> created
<PyQt5.QtWidgets.QLabel object at 0x7efd5ccbcd38> created
<PyQt5.QtWidgets.QAction object at 0x7efd5ccbcdc8> created
<PyQt5.QtWidgets.QAction object at 0x7efd5ccbce58> created
<PyQt5.QtWidgets.QAction object at 0x7efd5ccbcee8> created
<PyQt5.QtWidgets.QAction object at 0x7efd5ccbcf78> created
<PyQt5.QtWidgets.QAction object at 0x7efd5ccc4048> created
<PyQt5.QtWidgets.QAction object at 0x7efd5ccc40d8> created
Current Version: 1.0.22
Current Release: 1.0.22
Update Available:False
I can have Pycharm open for adding code and running fbs and use QT Designer to live edit and rerun now. This is gamechanging. If i had been able to do this when first learning python i would have saved months of time. This is why im sharing to hopefully save some other people all that frustration.
Hi @mike2750 thanks for this!
The loops there are just for debugging, correct?
Using pyuic5 to generate a py file is fine – you can import it and subclass from it to create a window and modify it. The problem just comes when you edit that generated file – if you go back and change anything in your UI you’re now stuck.
There are some examples of it in the PyQt5 documentatation – I should update the book/tutorials with some more examples of this, easy to get stuck.
Nothing quicker than using the .ui file directly though!
I probably explained it wrong. Some more context.
basically I’m using the ui file which i can edit via QT designer and then use directly for the UI without converting it to python .py file first.
The loop is there to show the objects are dynamically loaded in the real app and usable without converting it to raw python code first. It’s importing the .ui file everytime the main.py is run.
I can edit the mainwindow.ui file in designer press save Then reload the main.py file to test which loads the updated .ui file and populates all the GUI into an object and that is then used in appcontext or MainWindow object. This means i don’t have to convert the .ui file via pyuic5 to python every time i make a change and then run it which is a real pita. This leaves all the logic for the UI editable via the QT Designer and only the CLI python code and logic in that same main file.
Hopefully that makes more sense.
It works with FBS too now. So when i want to really change the overall look of the app i can leave all that GUI in the .ui file vs having to splice in the new widgets by hand each time in the correct nested order. If you want to see a side by side for reference feel free to shoot me a mail @martin to my email on profile be happy to provide that.
Well apparently this is embarrassing, my example works but the loop part actually was not needed as you accurately observed. Now i see what the confusion was about. sorry about that. Been a long weekend… lol
I commented it out and stuff still seems to work without issues. So i guess when i overhauled the code and converted it all to use the .ui file whatever i thought that fixed must have gotten fixed in the process.
So short answer is yes you can totally do this from the .ui file but that loop i had in the first example isn’t needed. Give this a try. I also had no problems freezing or releasing it just make sure your copy the .ui file into the here so its not missing in frozen version
src/main/resources/base/mainwindow.ui
It’s still an amazing approach imho even if the reason why i thought it worked was incorrect lol
For FBS:
import os
import sys
import requests
from PyQt5 import uic, QtWidgets
from PyQt5.QtCore import *
from PyQt5.QtGui import *
from PyQt5.QtWidgets import *
from PyQt5.QtWidgets import QApplication
from fbs_runtime.application_context.PyQt5 import ApplicationContext, \
    cached_property

target_db = os.path.join(os.path.abspath(os.path.dirname(sys.argv[0])), "wizardassistant.db")


class AppContext(ApplicationContext):
    def run(self):
        version = self.build_settings['version']
        QApplication.setApplicationName("Wizard Assistant")
        QApplication.setOrganizationName("Wizard Assistant")
        QApplication.setOrganizationDomain("wizardassistant.com")
        current_version = version
        self.main_window.setWindowTitle("Wizard Assistant v" + version)
        self.main_window.show()
        return self.app.exec_()

    @cached_property
    def main_window(self):
        return MainWindow(self)


qtCreatorFile = os.path.join(os.path.abspath(os.path.dirname(sys.argv[0])), "mainwindow.ui")  # Type your file path
Ui_MainWindow, QtBaseClass = uic.loadUiType(qtCreatorFile)


class MainWindow(QtWidgets.QMainWindow, Ui_MainWindow):
    def __init__(self, ctx):
        super(MainWindow, self).__init__()
        self.ctx = ctx
        # def __init__(self, *args, **kwargs):
        #     super().__init__(*args, **kwargs)
        self.setupUi(self)

        #Put all your custom signals slots and other code here.


import sys

if __name__ == '__main__':
    appctxt = AppContext()
    exit_code = appctxt.run()
sys.exit(exit_code)Ha, nice! Yeah, it’s a great way to develop the UI – makes it much easier to make iterative changes and see the effects.
Your post put an idea in my head, so I thought I’d follow through on it – can you dynamically replace the UI while the app is running? And, yes you can! Sort of.
from PyQt5.QtWidgets import QMainWindow, QApplication, QAction, QToolBar
from PyQt5.QtCore import QObject, Qt
from PyQt5 import uic

import sys

qtCreatorFile = "untitled.ui"  # Type your file path


class MainWindow(QMainWindow):

    def __init__(self):
        super().__init__()
        self.reload = None
        self.load_ui()

    def load_ui(self):
        print("loading ui")
        cls, baseclass = uic.loadUiType(qtCreatorFile)
        class Window(cls, baseclass):
            pass
        self.ui = Window()
        self.ui.setupUi(self.ui)
        # Move the central widget from the loaded UI main window our visible one.
        self.setCentralWidget(self.ui.centralWidget())

        if not self.reload:
            menu = self.menuBar()
            ui = menu.addMenu("UI")
            self.reload = QAction("Reload UI")
            self.reload.triggered.connect(self.load_ui)
            self.reload.setShortcut(Qt.CTRL + Qt.Key_R)  # You can reload with Ctrl-R

            ui.addAction(self.reload)


app = QApplication([])

w = MainWindow()
w.show()

app.exec_()
The trick here is to create an instance of a QMainWindow from the UI file, but then copy it’s central widget (which contains the the entire window UI) out onto your already active window. You’d could do something like this for the menus too.
This puts the actual UI under the self.ui object, this is actually the other QMainWindow instance(!) but it doesn’t matter.
I wouldn’t recommend this, but it was fun to try 
that’s pretty amazing @martin ![]()
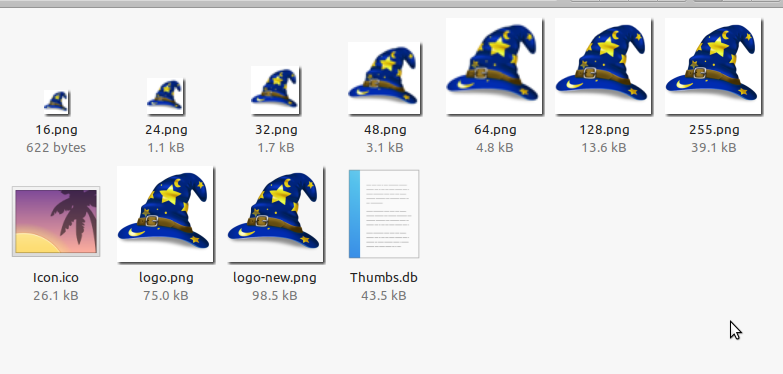
I also came up with this gem for fbs based packaging to generate the app icons which with some more looping and slight adjustments for mac i bet would make for a nice tutorial or content
import os
import sys
from PIL import Image

# https://pillow.readthedocs.io/en/stable/installation.html#basic-installation

base_icon_sizes = [(16, 16), (24, 24), (32, 32), (48, 48), (64, 64)]
linux_icon_sizes = [(128, 128), (256, 256), (512, 512), (1024, 1024)]
mac_icon_sizes = [(128, 128), (256, 256), (512, 512), (1024, 1024)]
image = Image.open('chevron_logo.png')

# Create base icon sizes in src/main/icons/base
for size in base_icon_sizes:
    # print(size[0])
    fileoutname = os.path.join(os.path.abspath(os.path.dirname(sys.argv[0])), "base", str(size[0]) + ".png")
    new_image = image.resize(size)
    new_image.save(fileoutname)
    print('Icon created: ' + fileoutname)

# Create linux icon sizes in src/main/icons/linux
for size in linux_icon_sizes:
    # print(size[0])
    fileoutname = os.path.join(os.path.abspath(os.path.dirname(sys.argv[0])), "linux", str(size[0]) + ".png")
    new_image = image.resize(size)
    new_image.save(fileoutname)
    print('Icon created: ' + fileoutname)

# Create mac icon sizes in src/main/icons/mac
for size in mac_icon_sizes:
    # print(size[0])
    fileoutname = os.path.join(os.path.abspath(os.path.dirname(sys.argv[0])), "mac", str(size[0]) + ".png")
    new_image = image.resize(size)
    new_image.save(fileoutname)
    print('Icon created: ' + fileoutname)

# Create Icon.ico in src/main/icons/Icon.ico
new_logo_ico_filename = os.path.join(os.path.abspath(os.path.dirname(sys.argv[0])), "Icon.ico")
new_logo_ico = image.resize((128, 128))
new_logo_ico.save(new_logo_ico_filename, format="ICO", quality=90)
print('Icon created: ' + new_logo_ico_filename)
Was using this and ended up making it work to now generate them all in the proper folders
Recommended path:
src/main/icons/icongenerator.py
Also submitted the idea upstream cause this would be great if it was built in.
Its been awhile since i posted but after helping many friends and others and working on more prototype ideas i realized a better template/skeleton was needed that bootstraps all this stuff for both fbs and better repo management.
I made this over weekend for rapidly prototyping Python gui apps from two of my favorite projects fbs and poetry. Figured I’d share in case anyone here ever finds it useful.
I also left your site a shoutout @martin ![]()
This is really nice @mike2750 thanks for posting! I’d not come across copier before, but it looks perfect for something I’ve been thinking about – project templates for common PyQt application structures.
My pleasure and yeah it is pretty amazing and having poetry makes pinning external resources and dependencies easy as hell.
I forgot to link the copier main page:
https://copier.readthedocs.io/en/stable/